| Please support us. This website is made possible in part by people like you. Thank you! For more information chick here... |
| Please support us. This website is made possible in part by people like you. Thank you! For more information chick here... |
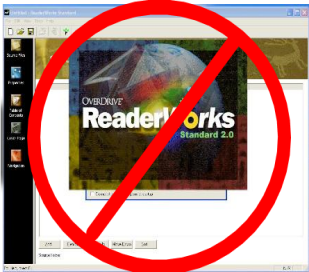 Some time ago, I reformatted my hard drive. I backed up nearly all
of my important files and programs except for one. Reader Works, a
standalone program that turned Microsoft Word (.doc) files into Microsoft
Reader ebook files. I did not save a copy of the installation program,
so when I realized that I never installed either Microsoft Reader or Reader
Works; I went to their respective websites. Much to my surprise, I
found that Reader Works no longer exists.[1] Those who have read “Proofreading and Learning
Disability: Microsoft Reader as a Proofreading Tool”[2] know I use Microsoft
Reader to proofread my writing. Additionally, they are familiar with
“Microsoft Reader as a Proofreading Tool: Windows Vista Update”[3] and
“Add-in: Read in Microsoft Reader and MS Word 2007;”[4] and know that the
Add-in: Read in Microsoft Reader does not work with Windows Vista or Word
2007. It only works with Word 2000, 2003, and XP. Since it is never a good
idea to have two versions of Word installed in the same operating system and
Add-in: Read in Microsoft Reader does not work, reliably, with Windows
Vista; I had a problem.
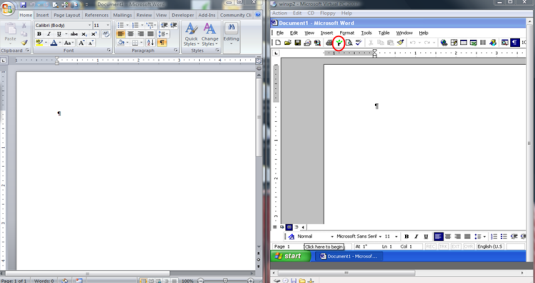
I am dependent on Office 2007. I like its features; I even like the Ribbon. However, I could not function without the ability to proofread my writing. I searched for a way to use the Add-in: Read in Microsoft Reader with Word 2007 without success. But, I did find Microsoft Virtual PC[5] which is a program that allows two different operating systems to run on the same machine at the same time. Virtual PC solved my problem. I used it to install Windows XP and Word XP. Now, I have two versions of Word running whenever I want, and I can proofread my work. It was not difficult to set up; just tedious and time-consuming. The following process should make the experience less tedious.
 First, I located my Windows XP operating system reinstallation CD with Service Pack (SP) 1
(from an old laptop) and the product key. Those two things are extremely important; an operating system recovery CD
will not work, and even though it is being installed on a virtual hard drive the product key is necessary.
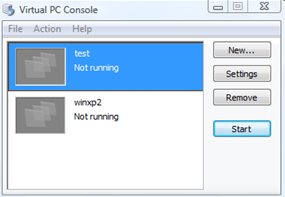
Then, I downloaded and installed Microsoft Virtual PC. The program creates a virtual PC and a virtual hard drive which
can be installed on any physical machine that has enough space or on a removable storage device such as a USB hard drive.
Remember, the virtual hard drive is a file it will not damage the storage device in any way.
After starting the virtual PC, I placed the Windows XP operating system reinstallation CD into the DVD drive and clicked
CD on the menu bar of the virtual PC window. From that point, it was like any other Windows XP installation.[6]
Once the operating system initialized after installation, I clicked Action on the menu bar of the virtual PC window, and
selected Install or Update Virtual Machine Additions.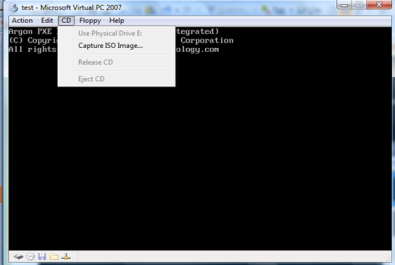 The Additions make it possible to control the properties for
Display, Networking, and File Sharing. The Additions lock the Display settings at (800 x 600) and 4 bit color.[7]
Similar to any Windows operating system installation, I needed to download service packs. In this case they were
SP2[8] and
SP3[9], and it is best to download them within the virtual PC. To do that, make sure the network adapter is
set to shared networking. The network adapter is located in settings, which is under Edit on the menu bar of the
virtual PC window.
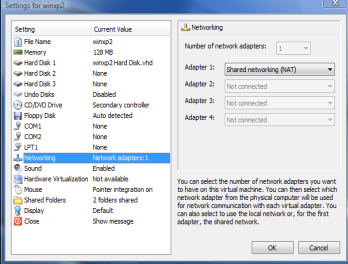 That allows the virtual PC to share the Internet connection with the physical machine.
I used my physical machine to search for the service packs, and then I copied the URL for each and pasted it into
Internet Explorer within the virtual PC. I, then, downloaded and installed SP2 and SP3. Once SP2 is installed the
Display settings are adjustable.
At that point, it appeared as though I had a functioning Virtual PC running Windows XP, so I placed my Office XP installation CD into the DVD drive; clicked CD on the menu bar and waited for the installation process to begin. I received an error message. Even though I was able to successfully install SP2 and SP3, the virtual PC did not have Windows Installer. Following the procedure used for the service packs, I searched for “Windows Installer XP;” found and installed Windows Installer 4.5, WindowsXP-KB942288-v3-x86.exe.[10] After it was installed, I was able to install Word XP and the other programs needed to proofread my writing.[11]
Overall, using Microsoft Virtual PC to meet my proofreading needs is more efficient than Reader Works. Additionally, the experience was an important reminder about the importance of saving downloaded installation programs, for they will be needed at some point in the future. Microsoft Virtual PC also allows, in theory, installation of the operating system from an (.iso) file. However after several attempts, I could not get the operating system to work. Fortunately, I had the operating system CD. If I had not had it, I would have purchased it. Being able to proofread my work is that important.
1 On May 16, 2011, I called OverDrive’s (http://www.overdrive.com/) Support Department, and was informed that Reader Works is no longer available.
2 John Keegan, “Proofreading and Learning Disability: Microsoft Reader as a Proofreading Tool,” http://jgkeegan.com/pad/pad.htm (accessed May 18, 2011).
3 Keegan, “Microsoft Reader as a Proofreading Tool: Windows Vista Update,” http://jgkeegan.com/pad/winvista.htm (accessed May 18, 2011).
4 Keegan, “Add-in: Read in Microsoft Reader and MS Word 2007,” Opinion, http://jgkeegan.wordpress.com/2008/05/19/add-in-read-in-microsoft-reader-and-ms-word-2007/ (accessed May 18, 2011).
5 Microsoft Virtual PC 2007, Microsoft, http://www.microsoft.com/windows/virtual-pc/support/virtual-pc-2007.aspx (accessed May 16, 2011). The version of Virtual PC used is dependent upon the operating system installed on the physical machine. Virtual PC 2007 pertains to Windows Vista and Windows XP; Windows 7 users should click this link http://www.microsoft.com/windows/virtual-pc/default.aspx and follow the instructions.
6 See Keegan, “Reinstalling Windows XP,” http://jgkeegan.com/winxp.htm (accessed May 18, 2011).
7 Once SP2 is installed the Display settings are adjustable.
8 Windows XP Service Pack 2 Network Installation Package for IT Professionals and Developers, Microsoft, http://www.microsoft.com/downloads/details.aspx?FamilyId=049C9DBE-3B8E-4F30-8245-9E368D3CDB5A&displaylang=en (accessed May 18, 2011).
9 Windows XP Service Pack 3 Network Installation Package for IT Professionals and Developers, Microsoft, http://www.microsoft.com/downloads/en/confirmation.aspx?FamilyID=5B33B5A8-5E76-401F-BE08-1E1555D4F3D4&displaylang=en (accessed May 18, 2011).
10 Windows Installer 4.5 Redistributable Microsoft, http://www.microsoft.com/downloads/en/details.aspx?familyid=5a58b56f-60b6-4412-95b9-54d056d6f9f4&displaylang=en (accessed May 18, 2011). There are several files listed. WindowsXP-KB942288-v3-x86.exe is appropriate for this setup.
11 See note 2